3D printing lessons learned: Bambu glue vs Elmer’s.

So roughly 50 prints later, I’ve learned a couple things that may be helpful in your printing journey.

  1. Glue matters. Your new print plate will adhere a little too well to the print. Using the Bambu provided glue stick will help make your part easily removable. However, if you find that you’re running low on their branded glue stick, I’d caution you to be careful about which glue stick you use as a substitute. In this case, I used an Elmer’s glue stick. Right away, applying the glue, there was an immediate difference in texture. This particular selection of Elmer’s leaves a thicker, choppier coating of glue. The Bambu glue stick goes on much thinner, creating a sheen surface. After printing onto the Elmer glue surface, the problem arose when trying to remove a large print surface from the plate. The glue was notably stronger, making the part more difficult to remove. Consequently, it caused the sacrificial sticker to lift and bubble from the plate surface. The lesson learned is to stick with the Bambu glue if you can or avoid large prints with the Elmer’s. There are many other glues out there that may perform as well or better, but the ones I’ve seen are more expensive.
  2. A smooth, clean print plate is optimal for print quality. With a bubble in my print plate, it predictably disrupts the usually pristine print surface. This probably weakens the print as well, which means I need to replace the sticker surface. Fortunately, I had ordered a backup print plate while I worked on replacing the cool plate sticker.
    Generic Elmer's vs Bambu Brand Glue
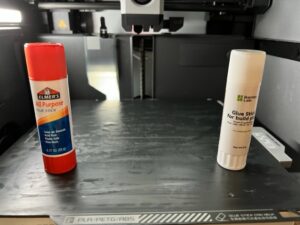
    These are the two glues I compared.
    Messier coating
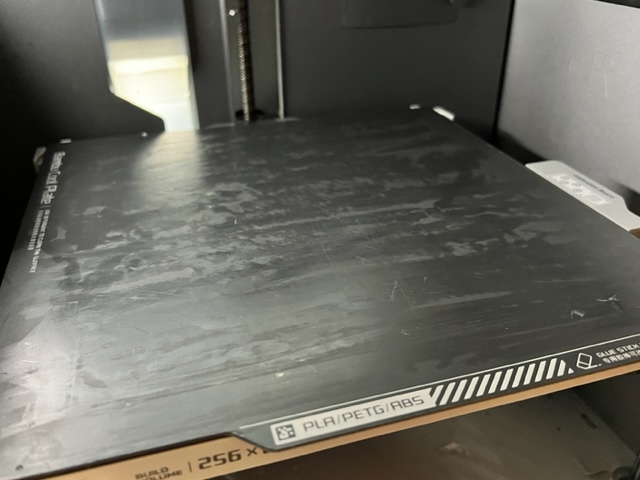
    Elmer’s goes on a little messier, with a thicker, choppier coating.
    Old vs New
    Left is the older print plate, after about 50 prints. On the right, is a brand new plate.
    bubbled surface
    The consumable print surface is lifted, resulting in a bubble.

    Damaged print plate results in irregular part surface.
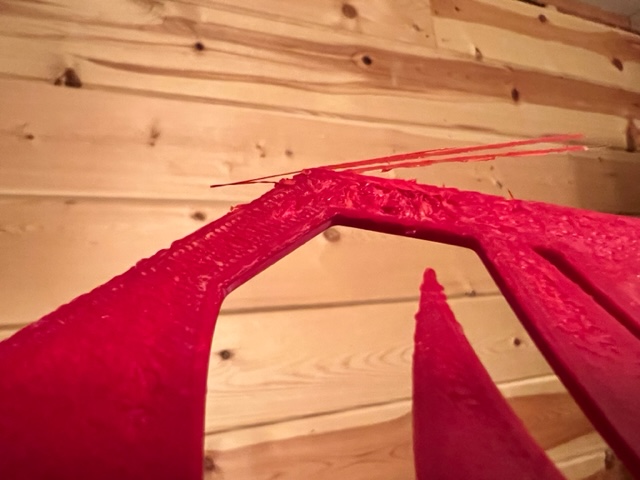
    Usually, the 1st print layer is nice a smooth, but with the bubble, it comes out distorted.
More

eSUN PLA+ Filament Review for Bambu Labs X1 Carbon

I ended up purchasing 10 spools of 1.75mm PLA+ filament from eSUN to try. The main concern I had was the spool size, which, I think was listed as 8″ in diameter. However, upon, receiving the spools, they were actually 7 7/8″ in diameter which was perfect for my AMS (see why that’s important here). Furthermore, I didn’t have to purge any of the material for the AMS to work properly (see prior link). Right off the bat, this made the eSUN spools plug and play for my AMS. In that regards, I absolutely recommend these.

My order was delivered in two separate packages, a week apart. Each spool came vacuum sealed with it’s own packet of desiccant which is probably standard. No complaints there. Performance wise, PLA+ extrudes well and all of my prints haven’t encountered any problems thus far. During the filament flow calibration of each print, the calibration portion of the print comes out super thin, which does concern me, but the prints still turn out well. I guess the machine is doing it job and the flow calibration is worth doing. That’s it for my review. Thanks for reading!

Feel free to use my affiliate link here or coupon R3DWORKSHOP for 10% off.


More

Initial Review of Bambu Labs X1 Carbon with AMS

Initial Expectations…

Recently, I made my first foray into 3D printing with Bambu Labs X1 Carbon with AMS. As far as I understood, they’re a relatively new company, with the X1 series funded thru kickstarter, so while the move may have seemed risky, there’s a lot to love about this printer that convinced me this was worth the jump.

  • First off is speed. The X1 carbon prints up to 500 mm/s, which is blazing fast. It’s at least 3 times faster than your average printer. For someone new like me, speed is a plus because I want to make up the gap in my printing experience. By printing quicker, I’ll hopefully go through the learning process that much faster.
  • Second selling point for me was the AMS. The ability to print multiple colors without having to manage the reels myself posed a very attractive luxury. A single AMS can hold up to 4 reels. The X1 series can pair up to 4 AMS units for a grand total of 16 different colors.
  • Other selling points: the X1 Carbon comes with a built in camera for remote viewing using their app, their accessories and filaments are priced competitively, and they have onboard algorithm that detects and informs you of any glitches in the print job.

Now for what I’ve learned…

  • The speed is pretty incredible. Because they utilize a core XY motion system, the printer head just has to move in the XY plane while the printer bed does the incremental Z axis movement. This makes for some fast printing action. However, a drawback to faster prints is slightly lower printer resolution, especially on spherical objects. I’ve yet to fully experiment with the settings to see what yields the best results, so maybe it’s something that I still need to figure out. In summary, the speed is awesome; dip in quality, not really a problem for me.
  • The AMS could use 2 key improvements. I’ve come to realize that not all filament reel sizes are the same. As in, the reel holding your filament needs to be exactly 7 7/8″. If it’s any larger, like the 8″ diameter reels that filaments commonly come in, your AMS will have two problems. 1) The AMS won’t fully shut which prevents it from becoming an airtight chamber. I think this incentivizes you to stick with Bambu Labs’ own set of filaments. 2) If you try and close the AMS lid, the reel gets stuck and won’t spin properly. A couple workarounds I’ve come up with are to tape the enclosure (as shown below) and potentially respooling or trimming the reel so that it meets the 7 7/8″ reel diameter. Another issue I’ve found with the AMS design is even if your reel is 7 7/8″, if the reel middle comes fat (comes with too much new filament), it’ll interfere with the AMS filament control unit. I’ve had to purge a good portion of each new (non Bambu) reel, until it fits properly. Hopefully, I’ll be able to use the purged material in future smaller prints, but it’s still an unfortunate drawback to their otherwise great product.
AMS COMPATIBILITY WITH NON BAMBU FILAMENT REEL
AMS problem #1: AMS only designed to support 7 7/8″ reels.


AMS reel girth issue
AMS problem #2: AMS won’t spin with new reels.
  • The Bambu app is awesome to have while I’m out and about. If an error pops up, or if I’m curious about how the print job is going, I can look it up remotely and hit resume or stop as needed. The app also allows some control of the printer’s heat settings, print speeds, and filaments. All pretty handy on the go when needed.
  • The Bambu slicer works fine. It’s their proprietary slicer and as far as my experience goes, it’s easy enough to use. I appreciate the coloring function which helps you tell the printer which color filament goes where. I found the fill tool to be the easiest to use as shown in the figure below.
Bambu Studio Color Fill Tool

Bambu X1 Carbon with AMS Initial Review

That’s pretty much it for now. In the first 2 weeks, I’ve printed roughly 20 parts. Despite my gripe with the AMS, I’m overall, very pleased with the printer’s performance. It’s still early in the game, but time will tell if this printer continues maintain its initial quality performance. For now, I’d definitely recommend it if you have the budget. Thanks for reading!


More